Zyxel Account Authentication
Overview
There are several ways to log into Zyxel Web Portals, such as Nebula, Circle, SecuReporter, and so on. At the time of writing, the available login methods are listed below.
• Google or Apple Account Login (Google or Apple)
• Passkey (fingerprint, Face ID or PIN)
Google or Apple Account Login
Zyxel Web Portals support logging in with Google or Apple accounts. This section shows you how to:
However, there are a few limitations. If you want to switch from email and password login to Google or Apple account login, the system will prompt you to confirm the change. You must accept this prompt to use your Google or Apple account for future logins.
For example, if you already have a Zyxel Account and want to use Continue with Google so you can log in with your Google credentials, you can follow the steps below to switch the login method to Google.

Continue with Google
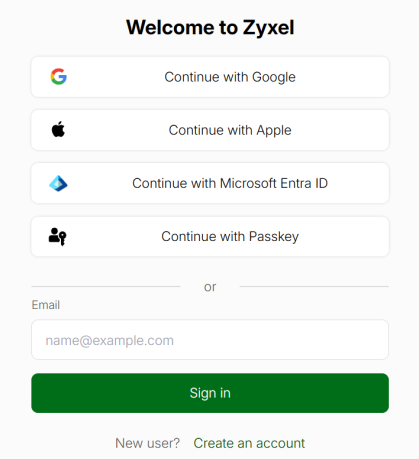
1 On the Zyxel Account login page, click Continue with Google.
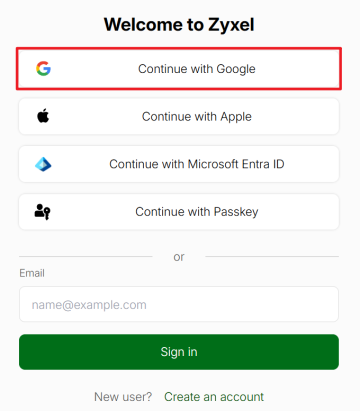
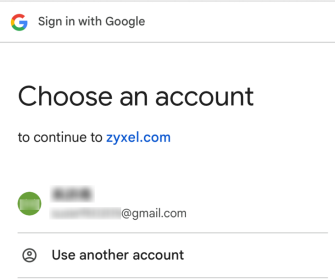
2 Log in to your Google account. If you are already logged in, follow the system prompt and select an account you want to log in with.
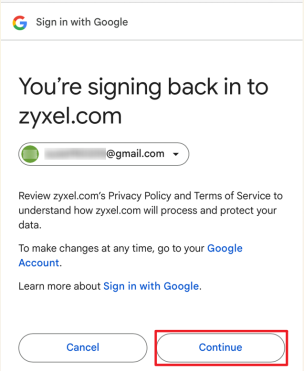
3 Click Continue so your future login method will be Continue with Google only.
Continue with Apple
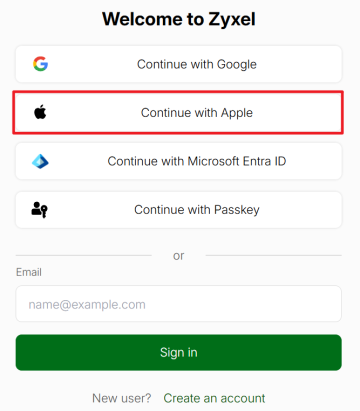
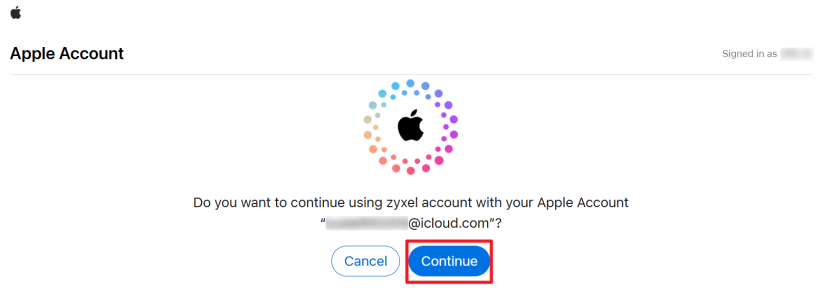
1 On the Zyxel Account login page, click Continue with Apple.
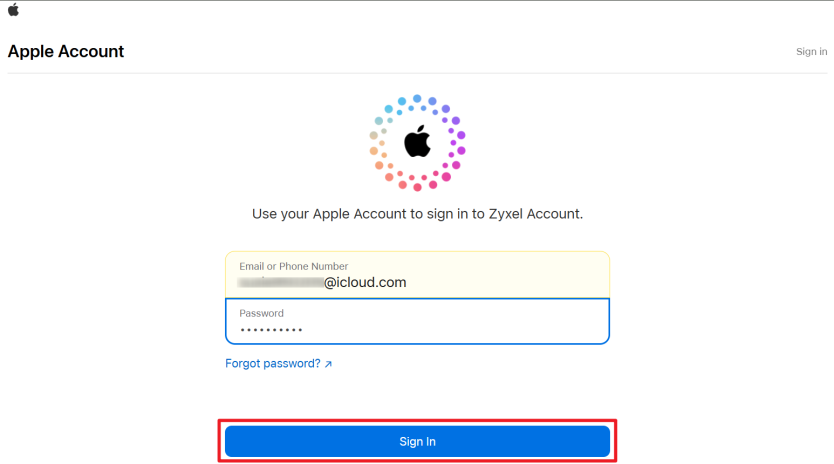
2 Log into your Apple account.
3 Click Continue so your future login method will be Continue with Apple only.
Microsoft Entra ID
Microsoft Entra ID is Microsoft’s cloud-based identity and access management service that allows organizations to manage user accounts, and enables Single Sign-On (SSO) across all platforms. Entra ID reduces password management overhead and improves security by ensuring that only authenticated users can access the Zyxel Account.
The following tutorial is for administrators, most likely the IT team in your organization, to configure the initial settings before general users can log in using this method.
In this section, we show you how to:
Before You Begin
You must have the following to set up Entra ID sign-in.
• Microsoft Entra ID administrator account with global administrator privileges.
• Zyxel Account using email and password sign-in method.
Enable Microsoft Entra ID
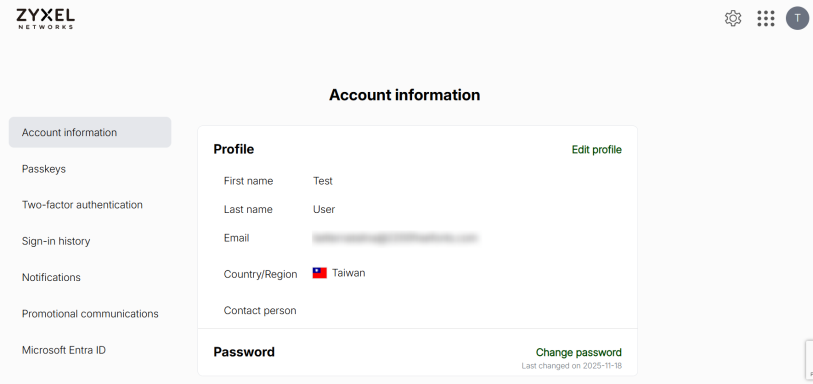
1 Go to your Zyxel Account.
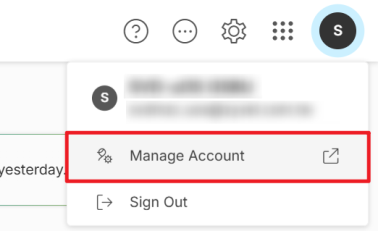
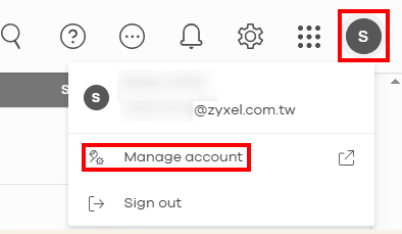
Alternatively, navigate to Manage Account under the profile picture when you are in another Zyxel platform.
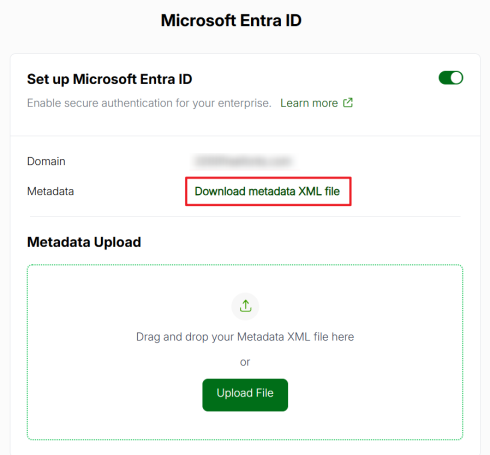
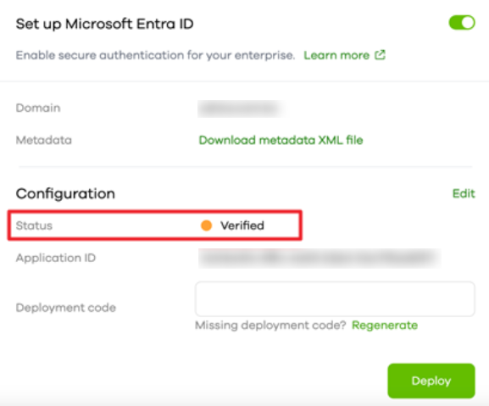
2 Go to the Microsoft Entra ID tab, and click the Set up Microsoft Entra ID switch to the right.
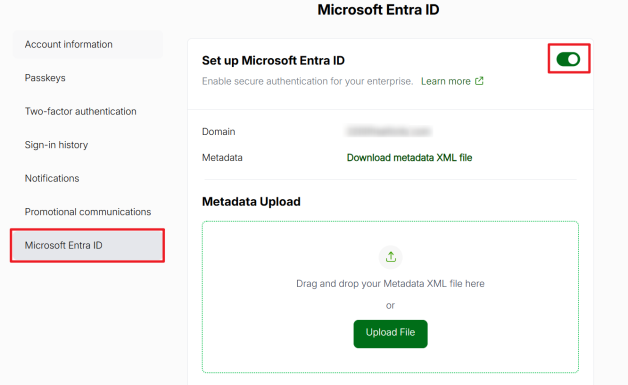
3 Click Download metadata XML file. You will need this later.
Create Enterprise Application
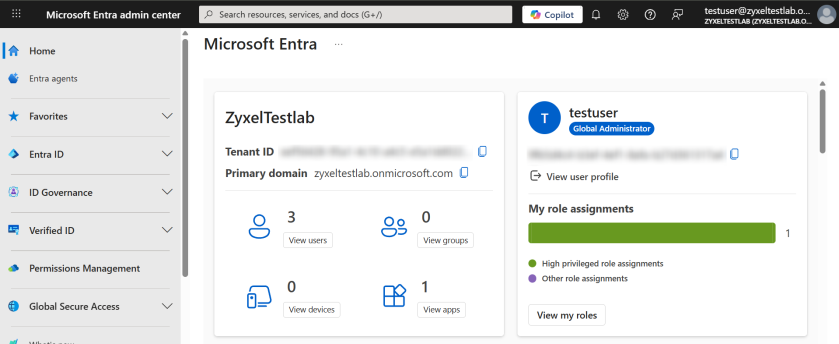
1 Go to the Microsoft Entra admin center. Sign in with a Microsoft Entra tenant account that has global administrator privileges.
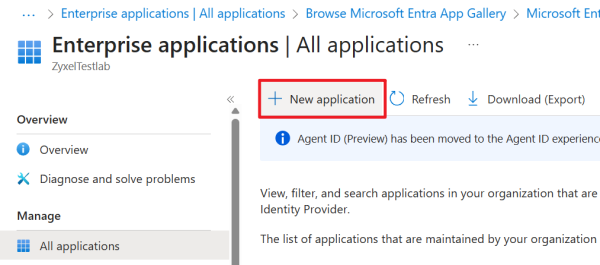
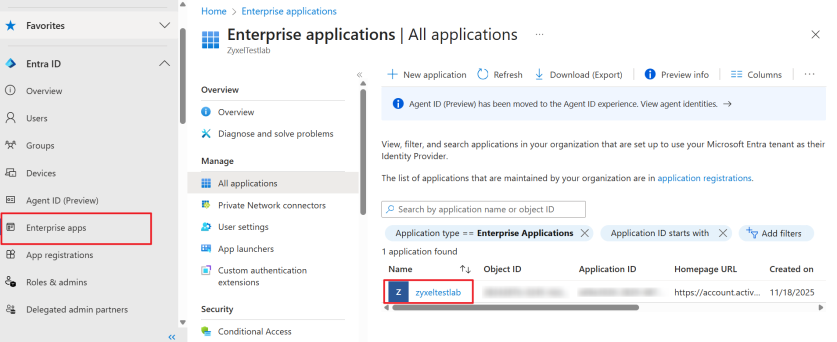
2 Go to Enterprise apps > All applications, and click New application.
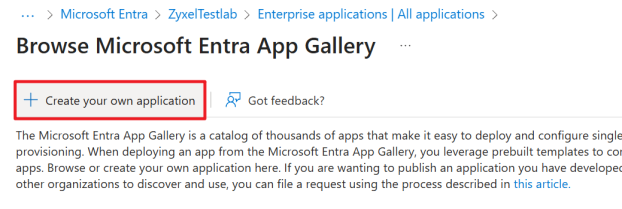
3 Click Create your own application.
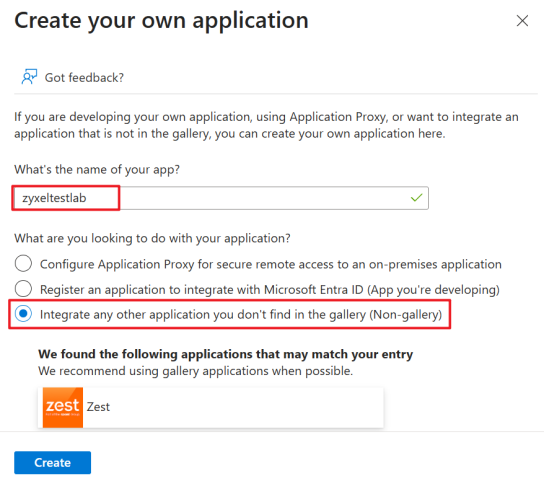
4 Enter a name for your application. Select Integrate any other application you don’t find in the gallery. Then, click Create.
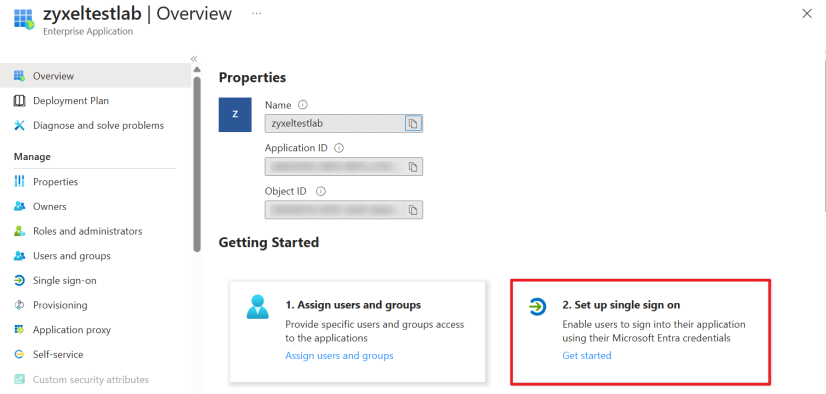
Configure Single Sign-on
Next, you need to configure single sign-on, which allows you to use the same login criteria on different platforms.
1 Select Set up single sign on.
2 Select SAML as the sign-on method.

Configure Attributes & Claims
Define Attributes & Claims at the application level. These claims tell the portal what user information to expect during login. All users assigned to this application automatically inherit these claims. You only need to configure this once.
1 Click Edit to configure this section.
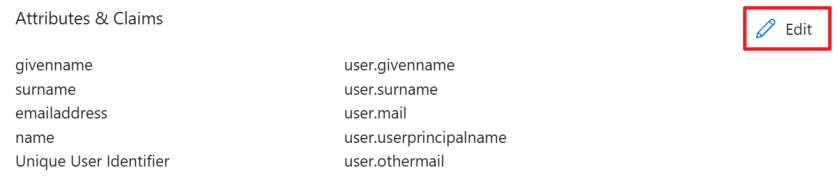
The default value and descriptions of each claim are shown in the table below.
Claim | default value | Optional / required | description |
|---|---|---|---|
givenname | user.givenname | Optional | User’s first name. |
surname | user.surname | Optional | User’s last name. |
emailaddress | user.mail | Optional | User’s primary email. |
name | user.userprincipalname | Optional | User’s login ID or display name shown in the portal. |
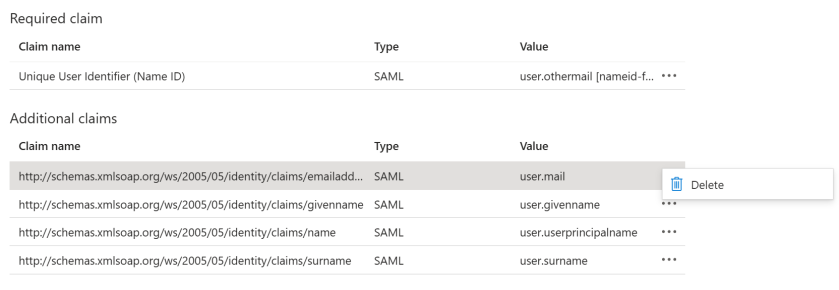
Unique User Identifier | user.othermail | Required | Unique internal ID used by the portal to identify the user. |
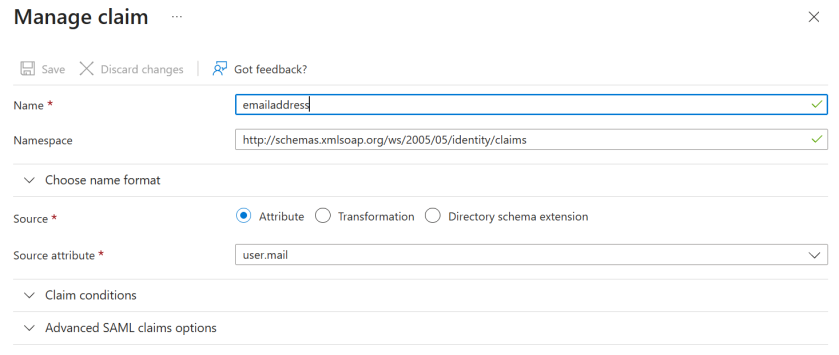
2 Click the claim that you want to edit to enter the Manage claim screen, or delete any claims you do not need.
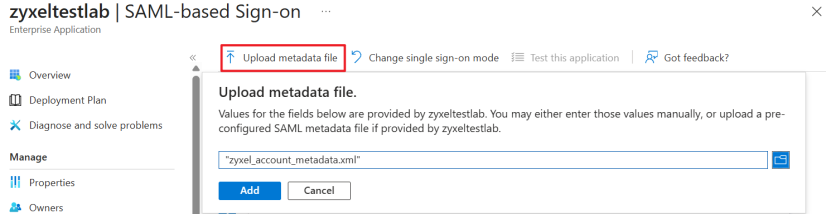
Download and Upload the Metadata File
1 On the Single sign-on page, go to the SAML Certificates section, and download the Federation Metadata XML file.
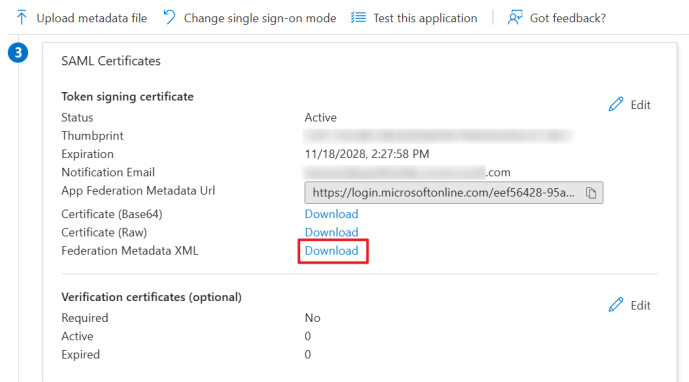 \
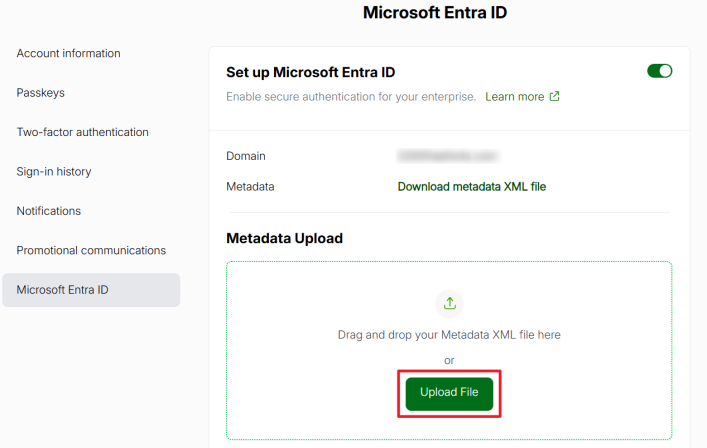
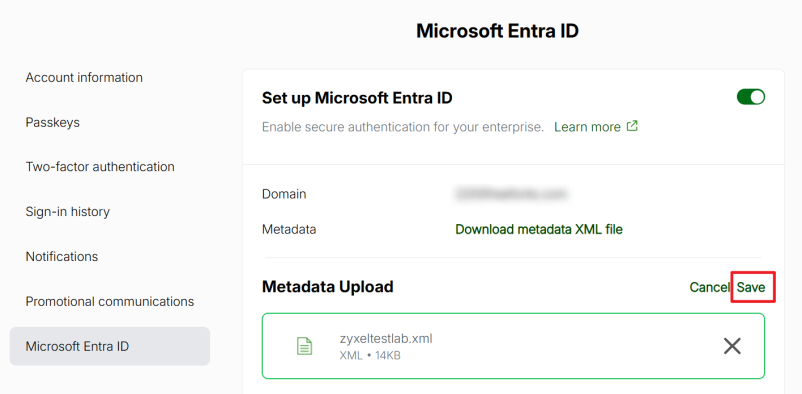
\2 Open your Zyxel Account page. Click Upload File, and select the file you downloaded in the previous step. Then, click Save.
Verify the Entra ID Configuration
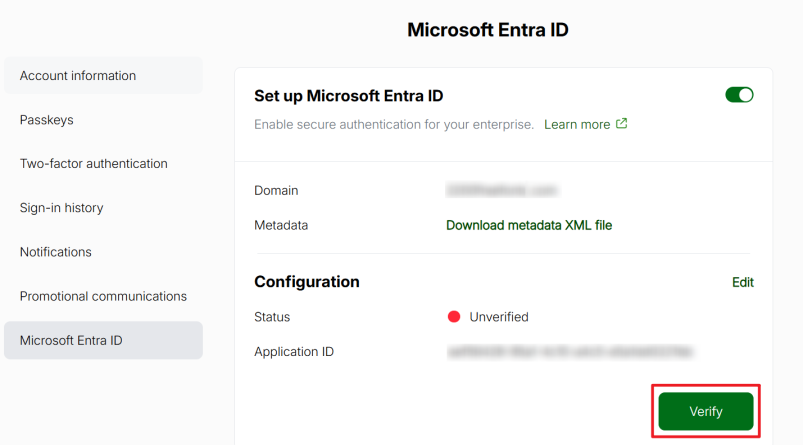
1 Click Verify to open a new verification page.
2 Sign in using the same email as your Zyxel Account.

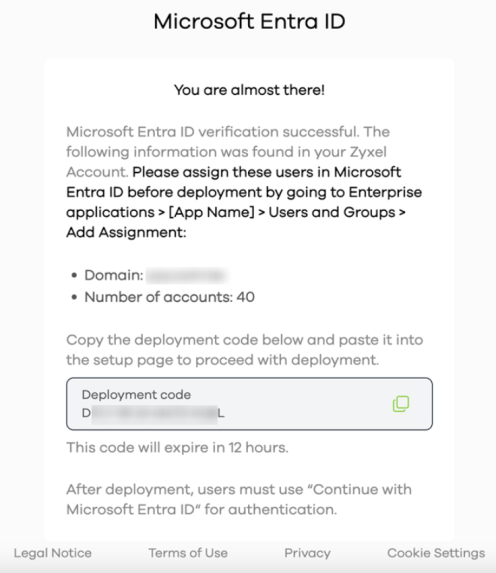
3 Upon successful login, you will see a verification success page with a Deployment code.
4 The status will change to Verified on the Entra ID Settings page.
Assign Users and Groups
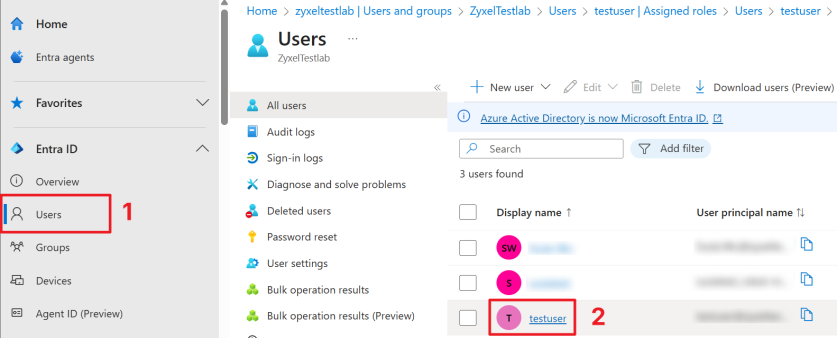
1 Return to the Microsoft Entra admin center. Go to Enterprise apps, and click on the application that you created earlier.
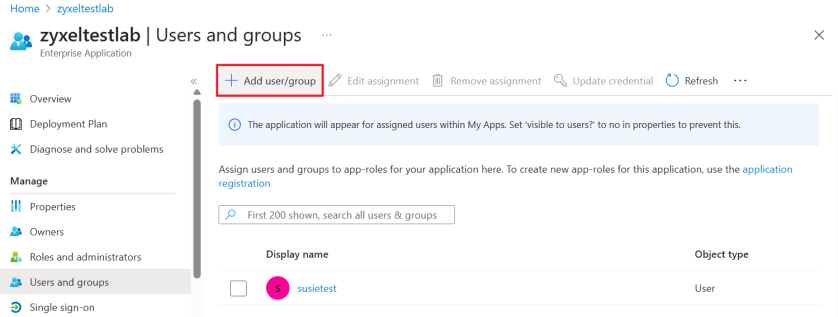
2 Click Assign users and groups.

3 Click Add user/group.
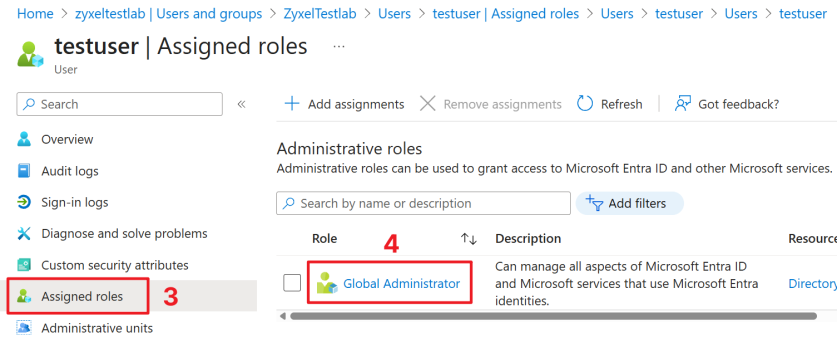
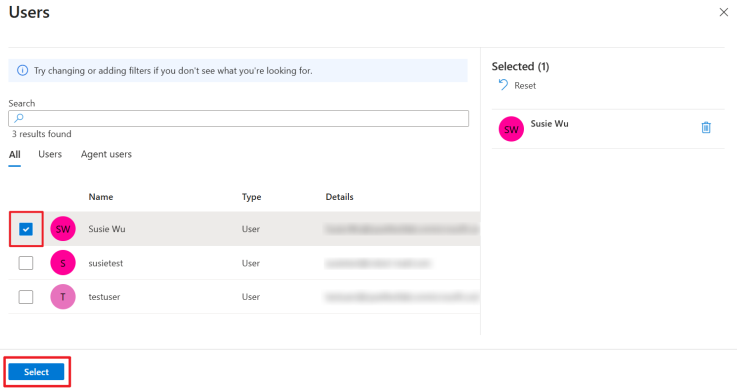
4 Select which users can use Microsoft Entra ID to access the company platform. Click Select.
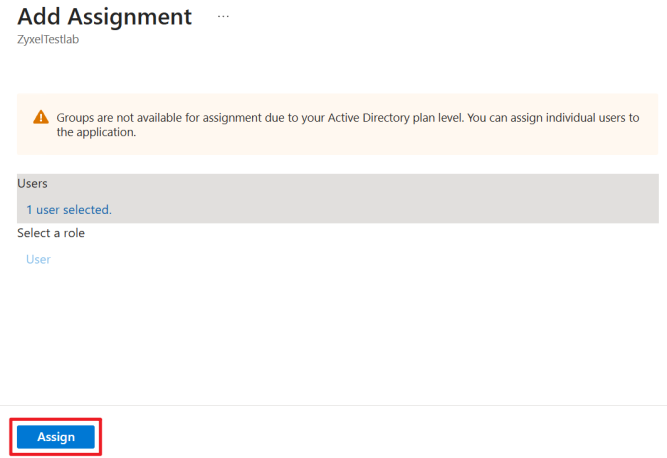
5 Click Assign to assign a role to the users.
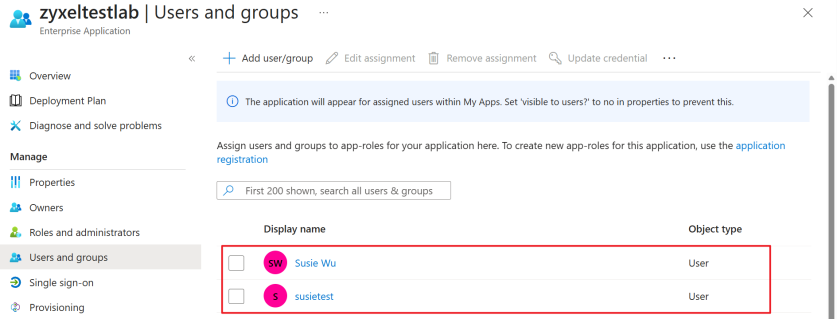
6 The users that are added to this application will display on the Users and groups screen.
Deploy Entra ID Settings
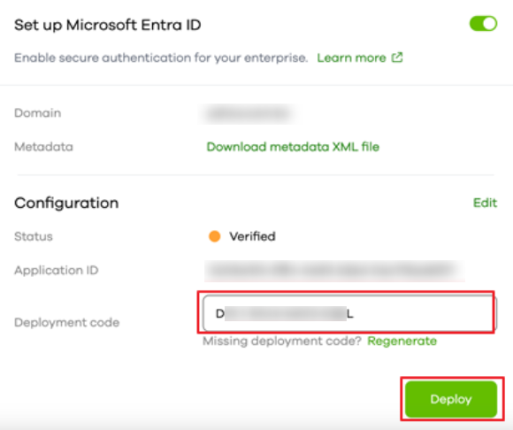
1 Copy the Deployment code from step 3 of the Verify the Entra ID Configuration section, and paste it in the Deployment code field on your Zyxel Account page. Then, click Deploy.
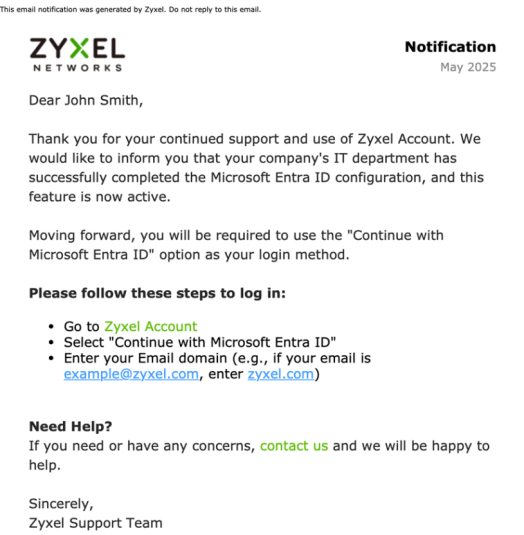
2 Selected users will receive a notification email.
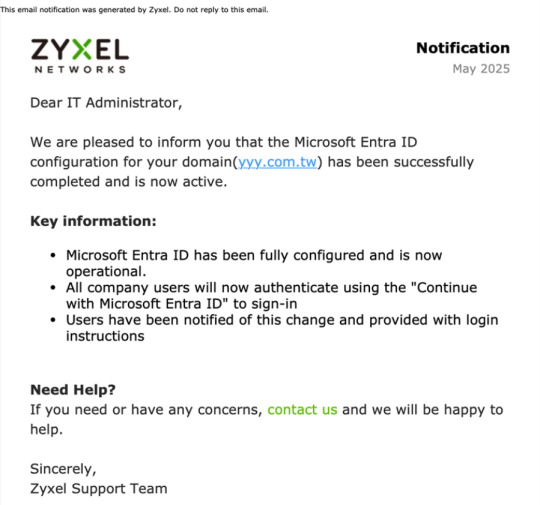
3 You as the administrator will also receive a confirmation email.
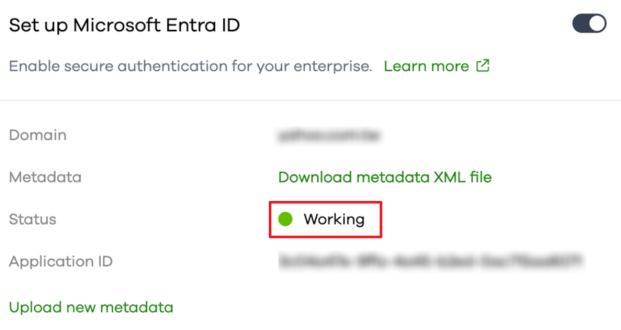
4 On the Entra ID Settings page, the status will now display Working.
Passkey
In this section, we show you how to:
A passkey is a login method that lets you log into a Zyxel Web Portal using the same way you unlock your computer or mobile device – fingerprint, Face ID, or PIN. You can use passkeys to log into Zyxel Web Portals, such as Nebula, Circle, SecuReporter, and so on.
When you create a passkey, your computer or mobile device generates two keys:
• Public key – stored on the Zyxel server.
• Private key – stored locally on your computer or mobile device.
Your device’s PIN or biometrics (for example, fingerprint, Face ID) is used only to unlock the private key, and is only stored locally on your computer or mobile device.
Maximum number of passkeys | 5 |
computer OS version | Mobile device OS version | web Browser version |
|---|---|---|
Windows 10 or later | iOS 16 or later | Chrome 109 or later |
macOS 13 Ventura or later | iPadOS 16 or later | Safari 16.1 or later |
ChromeOS 109 or later | Android 9 or later | Edge 109 or later |
Add a Passkey Using Windows Computers
1 Log into a Web Portal, click the Account icon at the top right corner, select Manage account.
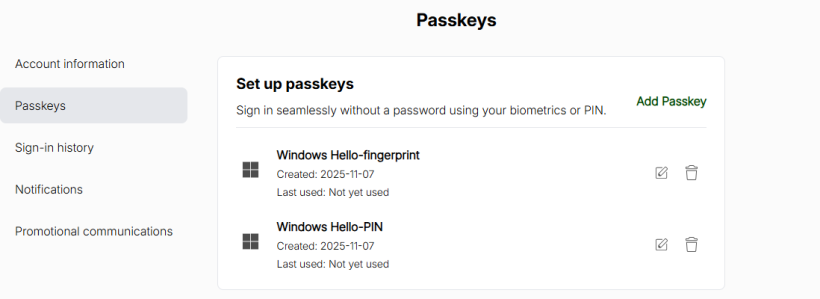
2 Go to the Passkeys tab and click Add Passkey.

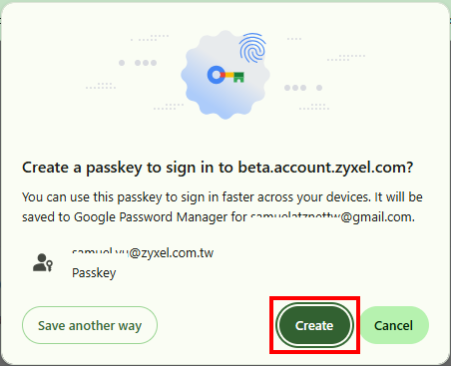
3 Click Create.
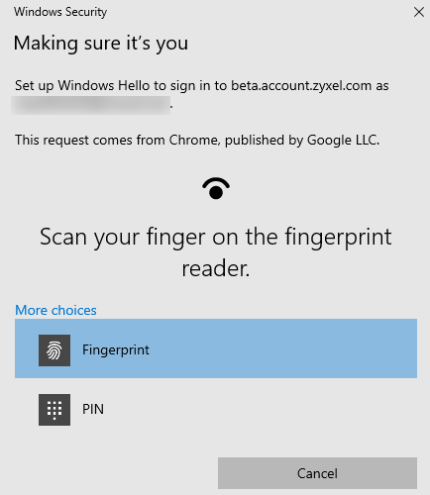
4 Your computer will prompt you to authenticate using biometrics (fingerprint or facial recognition) or your PIN.
• In Windows:
Go to Settings > Accounts > Sign-in options > PIN (Windows Hello) > I forgot my PIN. You will be prompted to re-authenticate using your Microsoft Account password or recovery options.
• In macOS:
Use your Apple ID to reset the passcode, or restore from another Apple device where you are still signed in.
• For Cloud Password Managers:
If you forget it, you can usually log in again using your master password or account recovery flow.
5 Authenticate using the PIN or biometrics that you already set on your device.
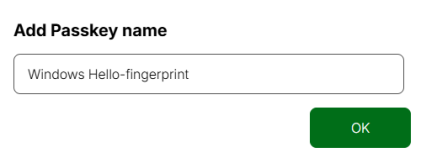
6 The passkey is now saved on this Windows computer. Name your passkey after completing the PIN authentication or biometrics authentication, and then click OK.
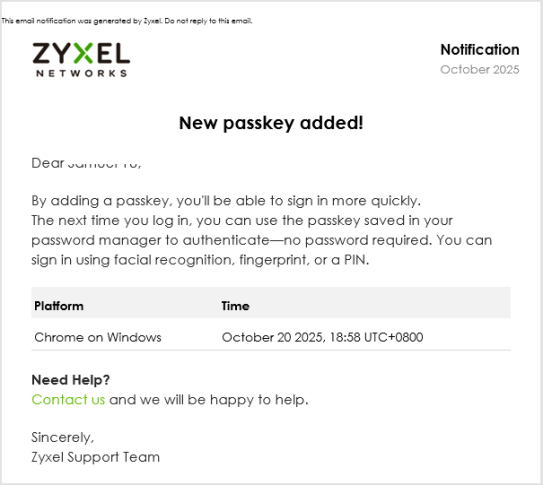
7 A New passkey added! email will be sent to the same email address used for your Zyxel Account.
8 You can view all your saved passkeys on the Manage account > Passkeys page. Select the passkey that matches the Windows computer you are using to sign in.
Add a Passkey Using Android Devices
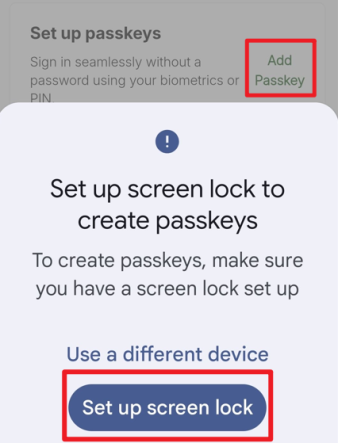
1 Log into your Zyxel Account, click Add Passkey. Click Set up screen lock, the system will lead you to Settings > Lock screen and AOD > Screen lock and biometrics.
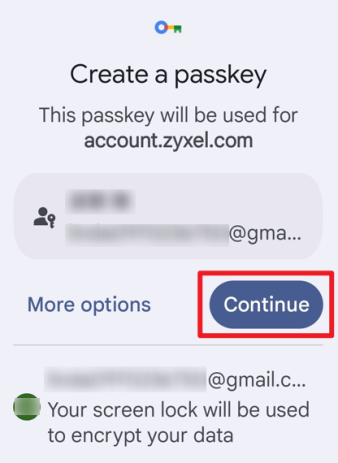
2 If you already have screen lock set up, click Continue to create a passkey.
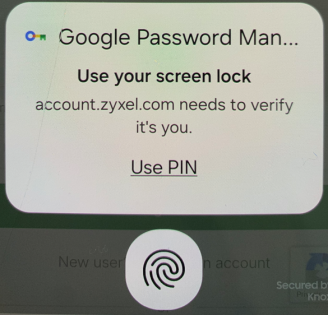
3 Authenticate using your fingerprint, face recognition, or screen lock PIN.
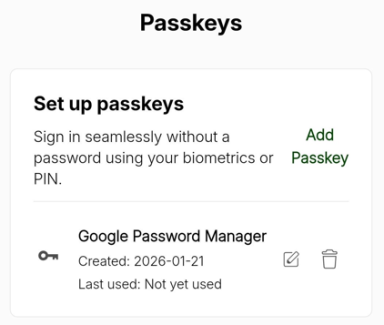
4 The passkey is now added and saved to your Google account.
Add a Passkey Using Apple Devices
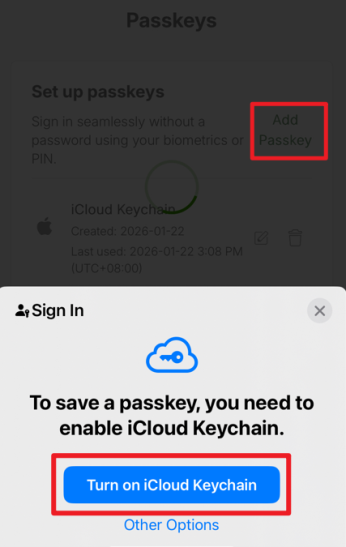
1 Log into your Zyxel Account, click Add Passkey. Click Turn on iCloud Keychain to enable iCloud Keychain.
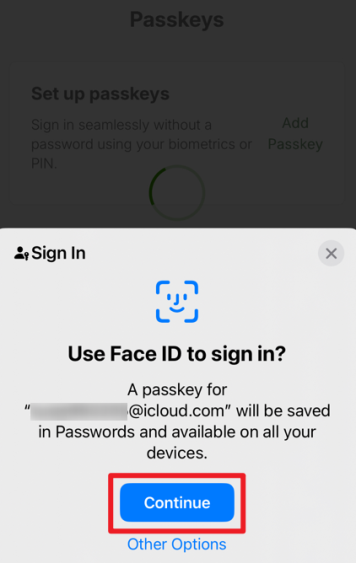
2 If your Apple device’s iCloud Keychain is already on, click Continue to sign in with Face ID.
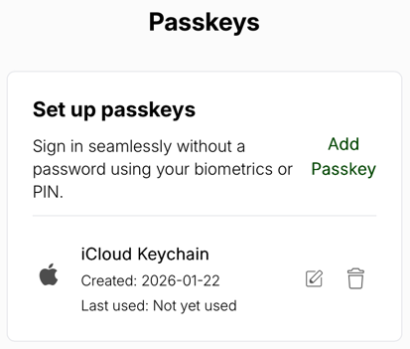
3 The passkey is now added and saved to iCloud Keychain.
Log in with a Passkey
The passkey is stored locally on your computer or mobile device. If you have enabled cloud synchronization on your computer or mobile device, you can log in from other devices, but those devices must use the same operating system, such as Windows, Google (Android) or Apple. If not, you must log in using the same computer or mobile device where the passkey was registered.
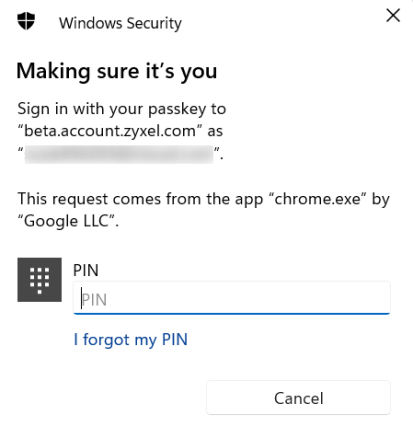
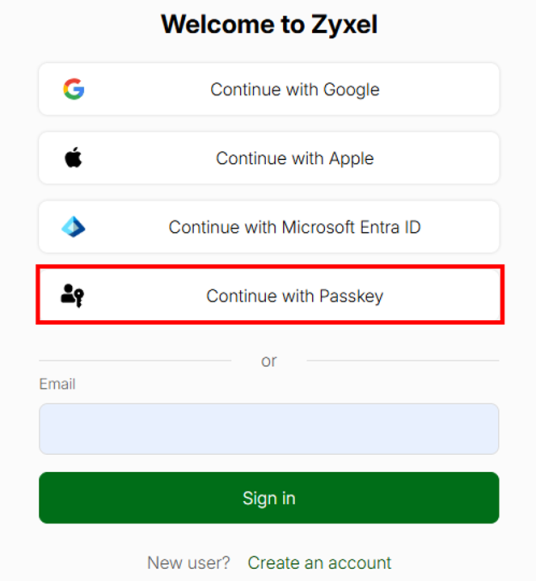
1 On the login screen, click Continue with Passkey.
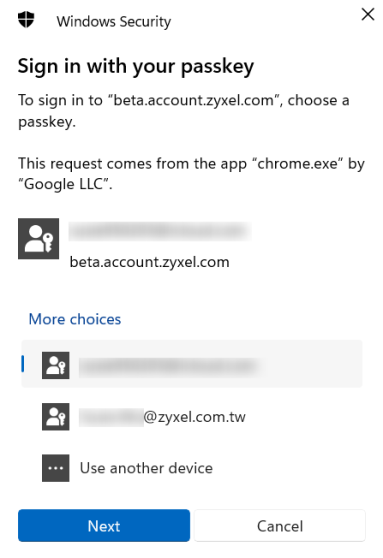
2 Select the account email you want to sign in with, and click Next.
3 Complete the biometric authentication by using your device’s fingerprint reader to scan your fingerprint, or camera to map your face, or by entering a PIN to log into the Zyxel Web Portal.