Report Settings
Click History > Report > Report Settings to enable or disable a report profile, and configure what to include in your customized report. You can also make changes to existing report configurations.
Smart Summaries
AI generates smart summaries based on the (raw) data collected from the weekly report. Created summaries allow you to identify key insights quickly and act promptly if need be.
Recommendations and possible causes are provided for abnormal security detection events based on data evidence, such as a significant increase in ADP, IPS, URL Threat Filter, or Sandboxing threats.
The smart summaries feature is enabled by default and included in the report notification email. When network performance is normal, no recommendations are given.
History > Report > Report Settings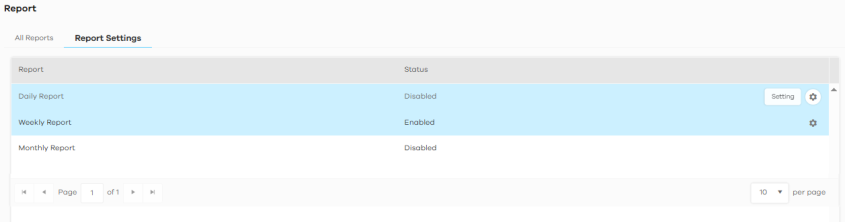
The following table describes the labels on this screen.
Label | DESCRIPTION |
|---|---|
Report | This displays the report type: daily, weekly or monthly report. |
Status | This displays whether this report type is enabled or disabled. |
Setting | Click this icon to go to a screen to enable or disable the report, configure a cover page, configure what contents to display, and configure who to send it to. |
Cancel | Click Cancel to restore your previously saved settings. |
Save | Click Save to save your changes. |
History > Report > Report Settings > Weekly Report Settings 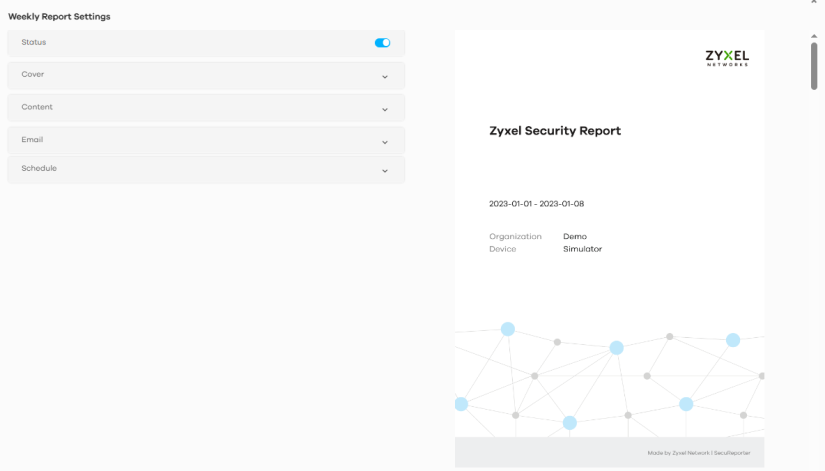
History > Report > Report Settings > Weekly Report Settings
The following table describes the labels on this screen.
Label | DESCRIPTION |
|---|---|
Status | Click the button to enable or disable the scheduled report. |
Cover | |
Cover Design | Select a cover style for your report. |
Customized Logo | Click the button to show or hide the logo you uploaded. Click Browse and select a graphic in JPG, JPEG, PNG, BMP, or GIF format that is smaller than 100KB to use as your logo. This logo will be displayed on the cover page of the report. |
Report Title | Enter a title to display on the cover page of your report. You can enter up to 144 characters. |
Content | The widgets are the security services and traffic indicators that you can select to be included in the report profile. Refer to Analysis for a description of the widgets. Select an item (with check mark) to include it in the report profile. |
Email | |
Email Title | This field allows you to enter a descriptive name for the report title (for example Zyxel Security Report). Up to 255 characters are allowed for the Email Title including special characters inside the square quotes [~!@#$%^&*()_+{}|:”<>?-=[]\;’,./]. |
Always receive report for device agent and admin? | Select Yes to enable the sending of a report in PDF format to the Zyxel Device’s agent and admin. Refer to SecuReporter Management Privileges for the privileges of agent and admin. |
Additionally, send email reports to: | This field allows you to enter the report’s designated email recipients other than the Zyxel Device’s agent and admin. Use a comma (,) to separate the email addresses with no space in between two email addresses. A maximum of 30 email recipients is allowed. (Example: adam@zyxel.com, brenda@zyxel.com) Inform recipients to first check their email junk/spam folder for SecuReporter reports and to then classify them as not junk/spam, so that they may be received in the email Inbox. |
Schedule | You can only schedule weekly reports. |
Report Schedule | Select a day of the week to have reports sent. |
Cancel | Click Cancel to restore your previously saved settings. |
Save | Click Save to save your changes. |
MSP Threat Report
The MSP (Managed Service Provider) Report feature allows administrators to group security data from all managed organizations of an MSP company. You can group organizations by geographical locations, individual customers, or by industries. It helps identify threat trends across groups, monitor any rise or decline in security threats, and generates PDF reports to easy share and review. To view the report of a single device, see Overview.
type | Maximum number |
|---|---|
Profile | 20 |
Device | 500 in total across all profiles |
Click MSP > MSP Threat Report to view and manage your profiles. Click + Add Profile to open the Profile Settings screen.
MSP > MSP Threat Report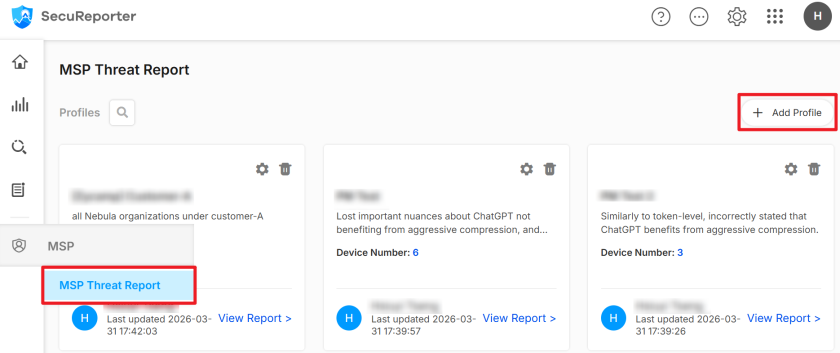
MSP > MSP Threat Report > Profile Settings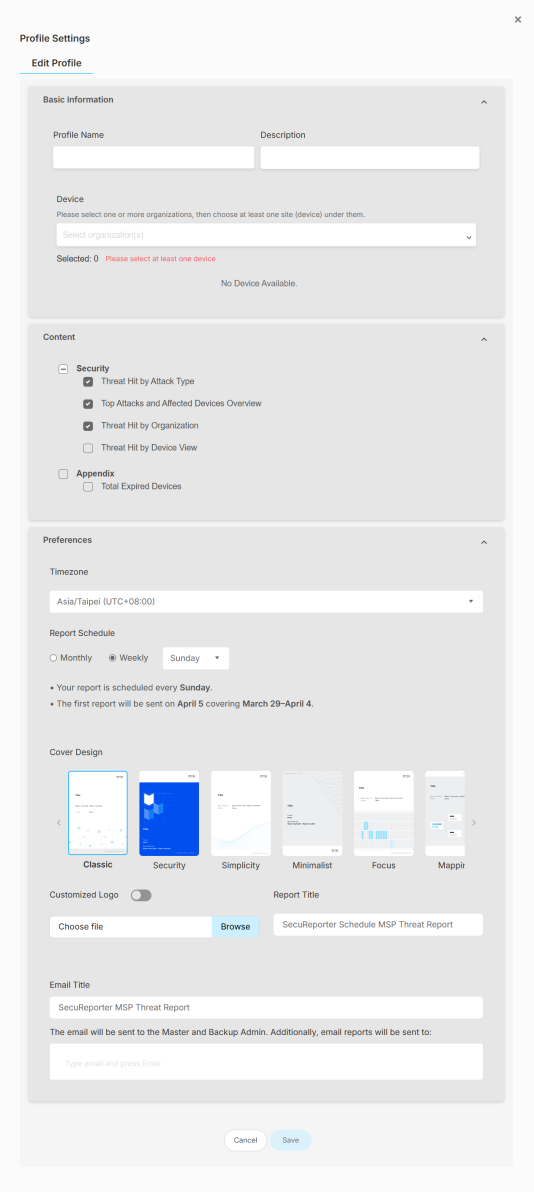
The following table describes the labels on this screen.
Label | DESCRIPTION |
|---|---|
Edit Profile | |
Basic Information | |
Profile Name | Enter a descriptive name for your profile. You can enter up to 255 printable characters. |
Description | Enter a description for your profile. |
Device | Select one or more organizations, then select at least one device under each one. Individual devices can be assigned to one or more profiles. |
Content | |
Security | Select which security contents and list of expired devices to include in the report. If none of them are selected, the report will only have the Cover Page and Overall Summary page. |
Appendix | Select this if you want the report to include the information of the expired devices. |
Preferences | |
Timezone | This field converts all device log time zones to a single time zone you select here. The reports are generated and sent based on this time zone. |
Report Schedule | Select Monthly to send the reports on the 1st of each month. Once set, you cannot change the schedule to Weekly. Select Weekly and the day of the week to send the reports. Once set, you cannot change the schedule to Monthly, but you can change the day of the week. At the time of writing, generating the report on demand is not supported. |
Cover Design | Select a cover style for your report. |
Customized Logo | Click the button to show or hide the logo you uploaded. Click Browse and select a graphic in JPG, JPEG, PNG, BMP, or GIF format that is smaller than 100KB to use as your logo. This logo will be displayed on the cover page of the report. |
Report Title | Enter a title to display on the cover page of your report. You can enter up to 144 printable characters. |
Email Title | This field allows you to enter a descriptive name for the report title (for example Zyxel MSP Threat Report). Up to 255 characters are allowed for the Email Title including special characters inside the square quotes [~!@#$%^&*()_+{}|:”<>?-=[]\;’,./]. |
Additional Recipient | Enter the email address of the additional recipient to receive the report. |
Cancel | Click Cancel to restore your previously saved settings. |
Save | Click Save to save your changes. |
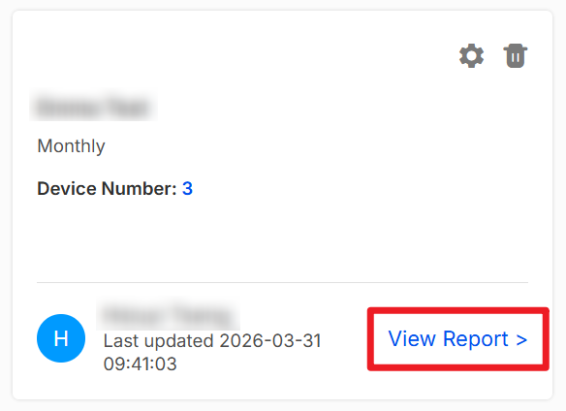
Download and Share MSP Threat Report
1 Click View Report > on the profile.
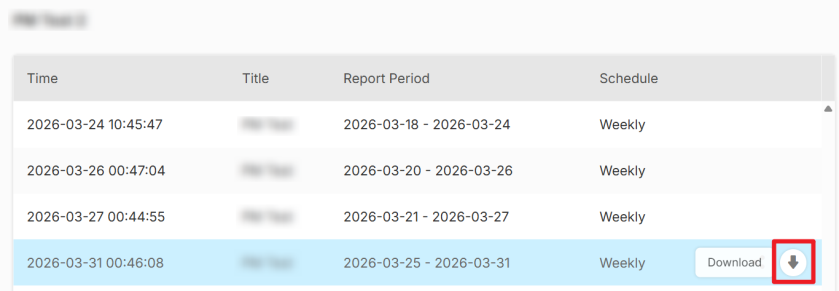
2 Select the Report Period and click Download to download the PDF report.
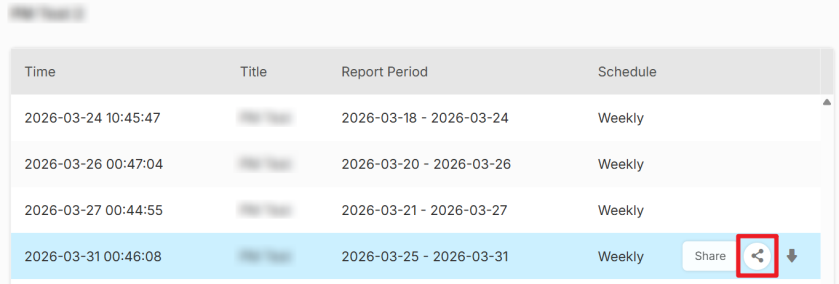
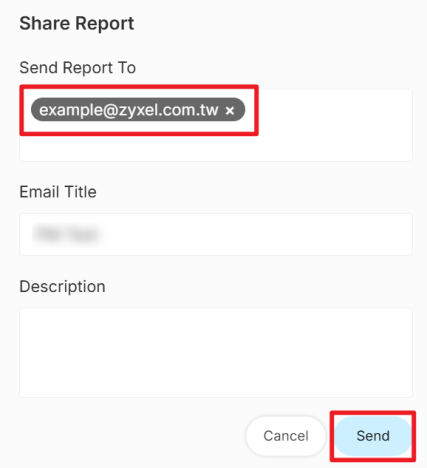
3 Click Share to send the report to other email recipients.
MSP Threat Report Content
The MSP Threat Report includes a Cover Page and Overall Summary page by default. To add optional contents, click the profile to open the Profile Settings screen, and select the contents under the Content tab.
MSP > MSP Report > Profile Settings > Content
The following table describes the contents in the MSP Threat Report.
content | description |
|---|---|
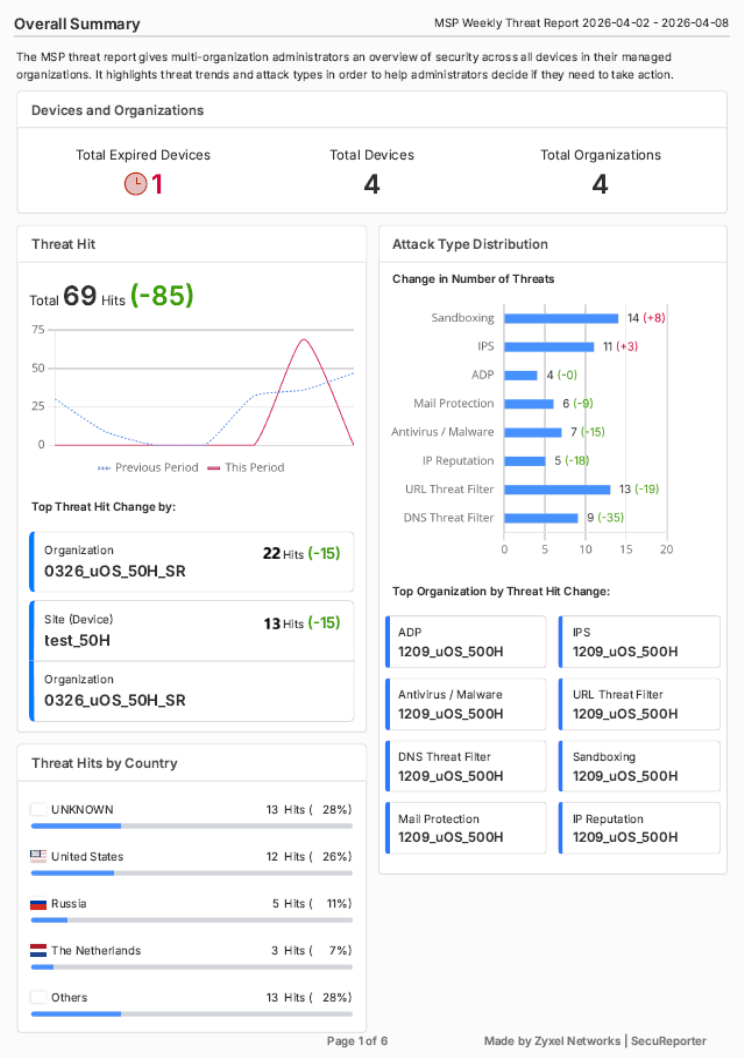
Cover Page | Displays the report title, report period and customized logo. |
Overall Summary | Displays an overview of threat hits, sorted by organization, site and country. |
Threat Hits by Attack Type (Optional) | Displays the attacks grouped by type across all security services. |
Top Attacks and Affected Devices Overview (Optional) | Displays which attack types that occurred the most and the devices most affected. |
Threat Hit by Organization (Optional) | Displays up to 20 (at the time of writing) organizations with the largest increase in the number of attacks. |
Threat Hit by Device View (Optional) | Displays up to 50 (at the time of writing) devices with the largest increase in the number of attacks. |
Appendix (Optional) | Displays the organization name, device name, MAC address and serial number of the expired devices. |
Below is an example of the MSP Threat Report.
MSP Threat Report Example